The text information of the site is stored in a database (DB). Interconnected tables are created within this database. A special query language SQL is used to interact with the database (examples of databases). Using a database can improve the performance of your site. To retrieve or enter information, it is much easier to interact with a single database than with a large number of disparate files.
ISPmanager
- To create a database in ISPmanager go to Tools - Databases - Add.

- Next, specify the Database Name. Select the Database Owner.
- Select the Database Server that will manage the database.
- Select Charset of data in the database. It is recommended to use utf8.
- Select an existing user to work with the database or create a new one. The Remote access option allows the user to work with the database from other servers (specify a list of allowed IP addresses).
- Click OK to save the changes.
VestaCP
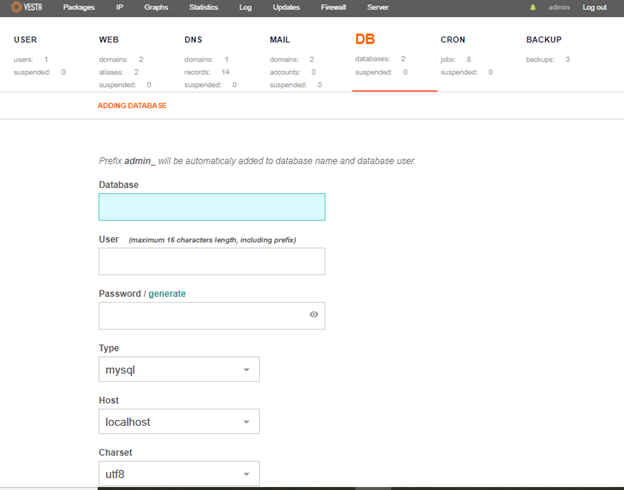
1. To create a VestaCP database, go to the DB section and click on the ADD DATABASE button.

In the new window, fill in all the form fields. Provide the database name, database username, password for the database user.
DirectAdmin
1. To create a database in DirectAdmin, click MySQL Databases on the panel menu. Then select Create new Database.
Enter a name for the database. The username can be the same or part of the database name. For example, if the database name is site1, then the username might be user_site1.
Then provide a password for the database and click Create.

BitrixVM
In the BitrixVM control panel, the database is created when adding a site.
1. Go to the main menu of the Bitrix panel (using the /root/menu.sh command).
2. Select 6. Configure pool sites.

3. In the next window open 1. Create a site.

4. Next, the site creation wizard will open.

- Enter database name - database name.
- Enter username – username, you can specify the name of the database.
- Enter password for database name - database user password.
- Re-enter password for database name - password from the previous point.
If you have any questions, please create a ticket to technical support.